How-to directions and photographs by Carey London of Harlem Hill
Over the last few winter weeks we have had some days to fill when school was canceled, so I decided to use the extra time at home to get the valentines started for my son’s classmates (and grandparents, aunts, and anyone special in his life because we think that is what Valentine’s Day is really about, celebrating all the forms in which love comes). As soon as I asked what he would like to make, without hesitation he said, “Dinosaurs!”, and we were off!
Here’s our version of a Dinosaur Valentine but you could do this same process to make anything that you or your kids love. And you can never go wrong with a good old-fashioned heart.
Dinosaur Tie-Dye Watercolor Valentines
Materials
- Watercolor Paper (or another similar heavyweight white paper)
- Watercolor paints
- Large Paintbrush
- A few pieces of scrap cardboard
- Scissors
- Pen/Pencil

Paper Painting
With a large paint brush or spray bottle saturate your watercolor paper (or other heavyweight white paper) with clean water. You don’t want it to be too sopping wet but you need a nice even layer of water. You might have to add more water as you go along if your paper starts drying out too much.

Choose two or three colors (or go crazy, don’t limit your kids and see what happens!) and start applying paint with your large brush to the wet paper. You won’t be able to fully control where the color goes but that’s the beauty in it and the part I think kids like the best! Pick it up, move it around to really get the color flowing.

Keep adding paint until you’re satisfied with the effect, at this point it might be starting to resemble that comfy old tie-dye t-shirt you wear to bed, which is exactly what we were aiming for.
Making the Stencils
While waiting for the paper to dry, use a piece of cardboard (ours were the tops of a few small shipping boxes we had lying around) and draw the outline of your pattern directly onto it. I drew the outlines freehand using some dinosaur picture references I have from our ever growing collection of books on the prehistoric creatures but I found many printable templates online that you could easily use to trace your pattern onto the cardboard. Cookie cutters or any stencils you already have would work just as well and you could skip this whole step and go directly to tracing on to the paper.

Once your outline is drawn, cut it out with a heavier pair of scissors. This is a step my son did not participate in because his “kid” scissors just wouldn’t cut it for this part of the project.


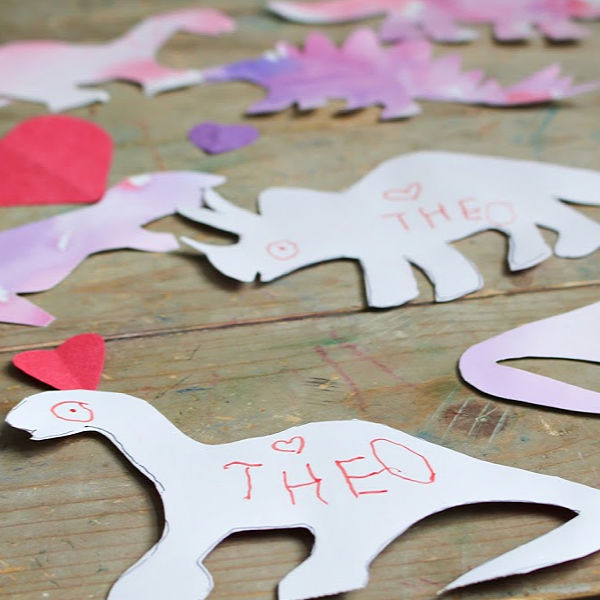
Trace the Stencils and Cut Out
When your painted paper is dry use a pencil to trace the stencils on the back (unpainted side) and cut them out. I had my son help with some of the easier cutting but if your shapes are very complex then you might find yourself doing most of the work. He loved adding little details like cutting out a mouth for each dinosaur and then drawing faces for them on the back. Write your love notes, send them out, and bring a smile to someone’s day!

Love,
Carey and Theo

Leave a comment